Monday, February 27, 2012

OAMC freezer pizzas

The Tobins go through alot of pizzas. Not only are they easy, they are so much better/better for you that those ones you get at the supermarket!


Mama's Scratch Frozen Pizzas
Makes 3 Pizzas

1 3/4 c room temperature water
1 T honey
3 T olive oil
3 c wheat flour
2 c white flour
2 salt
1 package yeast ( or 2 1/4 t)
Toppings of choice


1.  Place all ingredients into bread maker in order given, run on dough cycle
2.  Divide dough into 3 balls, place in 3 oiled bowls, let sit 30 minutes-1 hour.  (Can freeze at this point.  Rub oil over balls, saran wrap, foil wrap, LABEL! Use in 1 month)
3. Preheat oven to 350*

4.  Place one dough ball on pizza pan, stretch to fit entire sheet.  May take a 1-2 five minute rests for the dough to fully stretch

5.  Peirce dough with fork.  (This is so you don't get air pockets and a "lumpy" pizza crust)
6.  Cook for 5 minutes, let sit (Can be frozen at this point.  Wrap in saran wrap, then aluminum foil.  LABEL!  Use in 3 months)


7.  Top with desired toppings (Can be frozen at this point, Wrap TIGHTLY in saran wrap, then TIGHTLY in aluminum foil) (Cook frozen pizzas at 425* for 20-30 minutes.  This is very trial and error, person to person, dough to dough, oven to oven)


8.  Cook for 10-12 minutes 425* 8-12 minutes

Variations:
Obviously, you can have whatever you want on your pizza, but these are Tobin favorites
Pizza                  Sauce                       Toppings                     Cheese
1.  BBQ       1/2 c BBQ sauce     1/3 c shredded beef     2 c cheddar                                                     
                                                      1/2 c red onion     
                                                         fresh cilantro                              
2.Garlic Pie  1/2 c ricotta        1/3 c cooked chicken   2 c mozzarella
                                                 1 head roasted garlic 
3.  Buffalo    1/2 c buffalo sauce  1/3 c cooked chicken  2 c mozzarella
                                                       1/3 red pepper, diced            1/3 c blue cheese
                                                        3 green onions, diced
                                                         1 celery, diced
4.  Pepperoni1/2 c spaghetti sauce    pepperoni                       2 c mozzarella

Monday, February 20, 2012

OAMC French Toast

Mornings in the Tobin house are a little hectic.  And I only have 1 little one in school, I can only imagine in some of my followers houses!  I was tired of giving my little girl Nutragrain bars before school, I needed to find something quick, homemade, and something she would eat.  She got tired of banana bread quick, so I came up with this recipe with the thought that I could freeze it in individual portions and have a quick breakfast.


French Toast Casserole
about 16 "breakfast bars"

Ingredients:
Leftover bread
1 stick butter, softened
2 t cinnamon
1 1/2 c brown sugar
2 c milk
6 eggs
1 t vanilla


Directions:
1.  Preheat oven to 350*


2. Cut leftover bread into cubes, you need about 10-12 c worth


3.  Press into a greased 9 x 14 pan


4.  Combine rest of ingredients


5.  Pour over bread crumbs


6.  Bake for 35-45 minutes
7.  Let cool, slice into servings


8.  Wrap in saran, place in bag, freeze
9.  When wanted: Rewarm in microwave for 30-40 seconds

Thursday, February 16, 2012

OAMC Garlic Bread


The easiest thing for you to put into your freezer is garlic bread!  Who can eat yummy spaghetti sauce without garlic bread?!


Garlic Bread
1 Loaf, frozen, many servings!
Ingredients:
1 loaf french bread, sliced
1/2 c butter, softened
1/4 c Italian seasonings
1 T garlic powder
1/4 c Parmesan cheese


Directions:
1.  Combine butter, Italian seasonings and garlic.
2.  Butter each side of the bread


3.  Sprinkle Parmesan cheese over the butter mixture.


4. Cut french bread into thirds


4.  Wrap in saran and aluminum foil, use in 6 months.


5.  To cook fresh: bake at 350* for approx. 5 minutes
6. To cook frozen: bake at 350*  for approx 10 minutes, uncovered.

Monday, February 13, 2012

OAMC Canned Spaghetti Sauce

This is the recipe that started my OAMC journey.  Again, trying to make like easier for myself making my husbands spaghetti sauce once a week, I wanted to try canning.  Perfect starter recipe.  This recipe makes about 9 cans.  This isn't an exact recipe, you may have a little leftover/not enough.  Freeze that for pizzas or a meal for one some night.


OAMC Spaghetti sauce
9 cans
4 servings each

Ingredients:
8 green peppers
8 onions
2 heads of garlic
2 (46 oz) low sodium V8
105 oz Tomato Sauce
3 (12 oz)Tomato Paste
2 c Italian Seasoning

NOTE: To save time, you can cook and dice at the same time, if you do it in the correct order:

1. Pour about 1/2 c olive oil at the bottom of your stock pot, turn heat on med


2.  Dice your green peppers


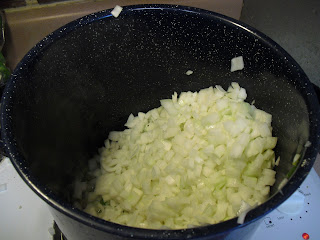
3.  Dice your onions


4.  Dice your garlic, stir mixture carefully


5.  Add Italian Seasoning


6.  Add tomato sauce, V8, cook for approx 1 hour
7.  Add tomato paste, cook another 20 minutes

Canning:


1.  Make sure your cans are clean. 
NOTE: You can reuse the rims, NOT the wax-lined lids.


2.  Sterilize in the dishwasher.  NOTHING else in the dishwasher.
NOTE: Once they come out of the dishwasher DO NOT touch the inside ANYWHERE. Otherwise, they will no longer be sterile and your Sauce will sour


3.  Get out your equipment


4.  Carefully pour your sauce into your cans. 
NOTE: Its very important that they are filled to the rim (at the blue funnel level) Not over, or your cans will explode.  Not under, or all your air wont evacuate


5. Screw lids on cans loosely to allow air to escape


6.  Evenly distribute your cans on your canner


7. FULLY SUBMERGE your cans in water. The reason canning works the way it does is because when your can is fully submerged in water, the excess air is forced out of the cans, and the wax ring doesn't allow water to enter the can.

8. Cook for 12 minutes

9.  Carefully remove cans from water, set on counter

10.  Allow cans to come to room temperature.  You should hear a few "pops" or "dings" in this time.  This means your cans have sealed and are ready for storage.  In about 3 hours time, if you press in the middle of the seal, and it still feels "cushy," that means the cans haven't sealed, put in the fridge and use within a week.